Pelajari cara membuat nasi ungu Korea atau Korean Purple Rice di rumah! Saya akan tunjukkan cara membuatnya menggunakan rice cooker, panci instan, dan di atas kompor. Beras ungu Korea tidak hanya cantik dipandang, tetapi juga memiliki beberapa manfaat kesehatan! Hari ini saya ingin berbagi resep yang sering diminta – Korean Purple Rice.
What is Korean Purple Rice
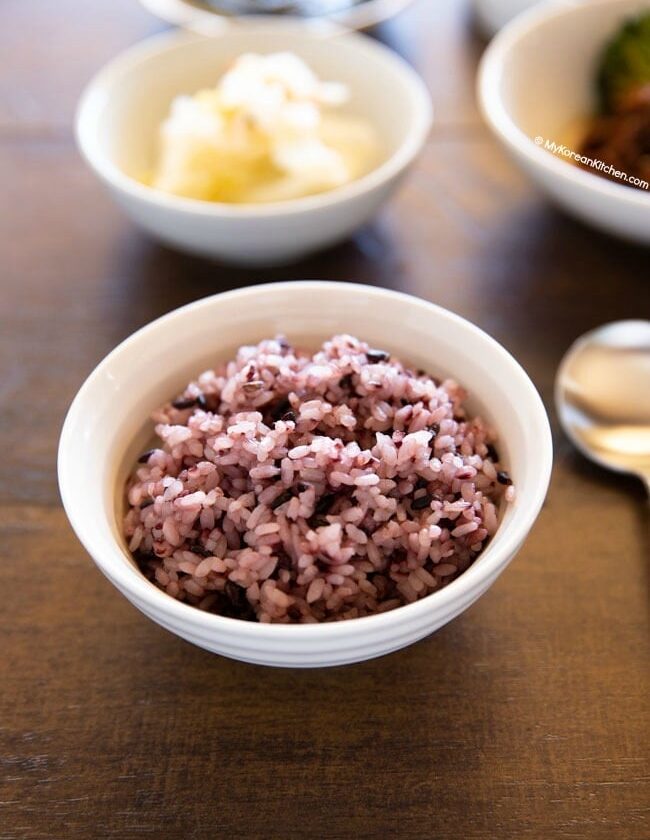
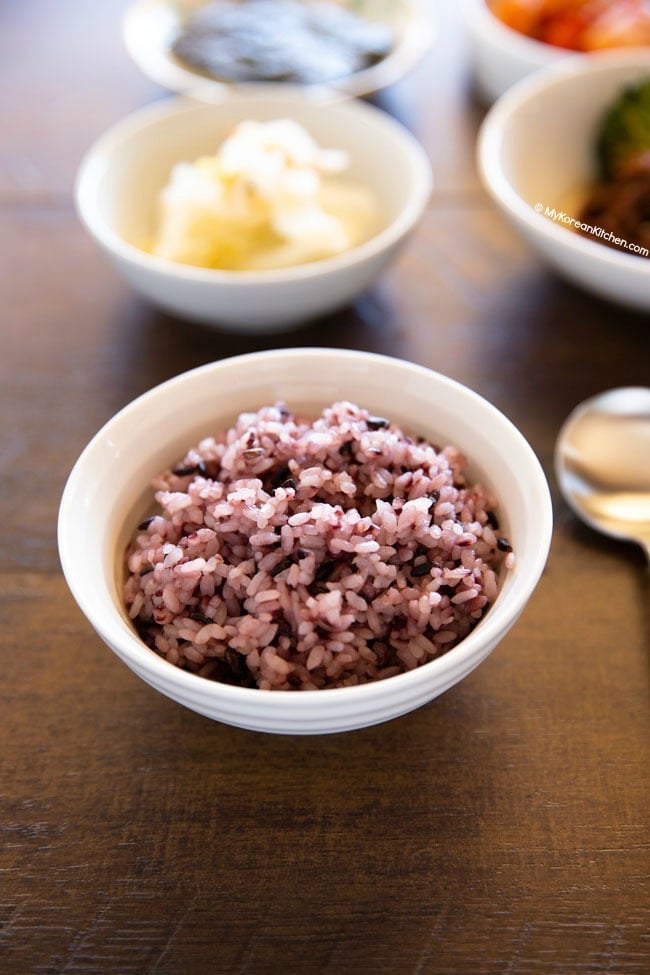
Korean purple rice is cooked Korean rice that has a purple hue. We call it heukmi bap (흑미밥) in Korean and it means black rice. But why do some people refer it as purple rice instead of black rice?
Essentially they both mean the same thing. The only real difference would be the shades of rice depending on how much black rice you add to your base rice (i.e. white rice) when cooking. The color shades of purple can be light to deep dark purple.
Though, it’s quite rare to see Koreans cooking with black rice only. Rather, we blend black rice with short grain (or medium grain) white rice.
Overall, I follow the below ratio for my purple rice.
- 1 cup short grain white rice + 1 1/2 tsp black sweet rice – 2 to 3 serves
- 2 cups short grain white rice + 1 Tbsp black sweet rice – 4 to 5 serves
By all means, you can change the ratio per your liking. Just do some experiments until you find your sweet spot. Keep in mind that changing the ratio will affect the overall texture, taste and cooking time of the purple rice.
I have also tried making the purple rice with (long grain) Jasmin rice and I don’t think the result is as good as when I used short grain white rice. (Just my two cents!)
Black Glutinous Rice vs. Black Rice
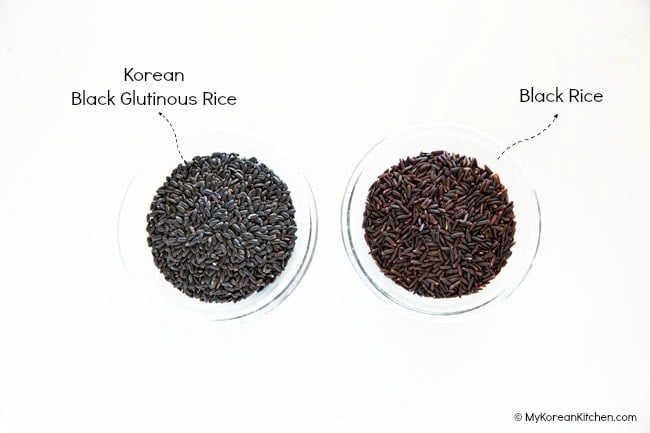

Largely, there are two different types of black rice in Korean cooking. One is black glutinous rice (찰흑미), which seems to be more commonly used when cooking with rice and the other one is non-glutinous black rice.
Black glutinous rice is also called black sweet rice and it gives a stickier consistency when cooked and it gives a slightly sweeter taste than regular black rice.
So far, I’ve tried Korean black glutinous rice (from a Korean grocer) and regular black rice (from my local grocer – Woolworth) and I have to say that I much prefer the result I get with Korean black glutinous rice.
I do not know what variety this regular black rice is but it had a slightly off putting smell to begin with. Also, the rice color was lighter (i.g. burgundy) than Korean black glutinous rice, which is close to black.
Also, the regular black rice I tried didn’t give much “purple color effect” when I cooked with white rice.
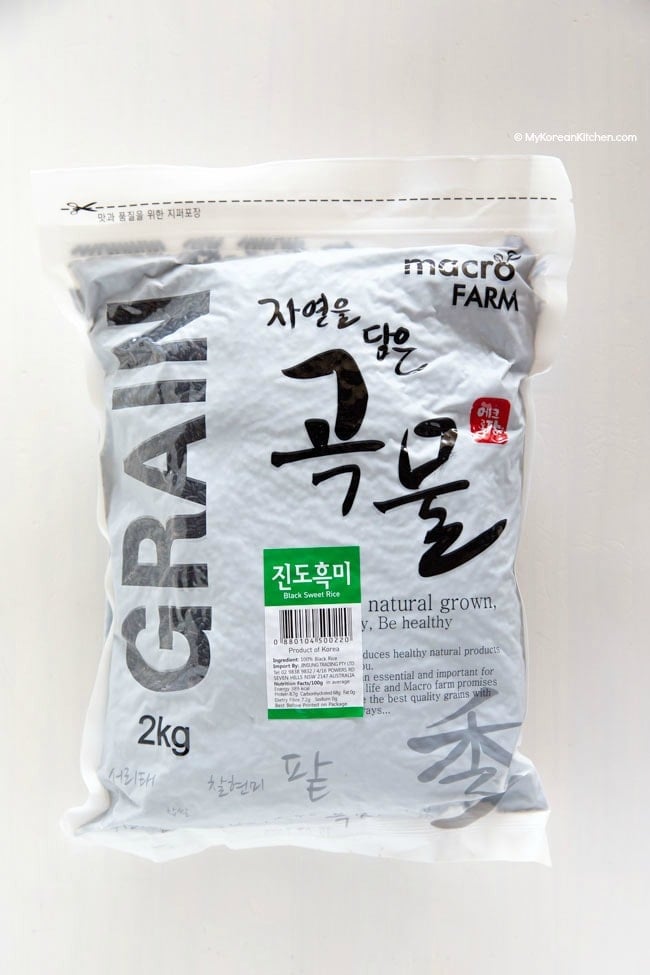
So my point is, the type of black rice you use will affect the outcome of your purple rice. In case you’re wondering, below is Korean black glutinous rice I used in this recipe. (About AU $20 for 2 kg / 4.4 pounds)

Is Korean Purple Rice Healthy?
Black rice is best known for its high content of anthocyanin. It is a powerful antioxidant that’s also found in purple eggplant and blueberries.
Also, black rice is a source of iron, fiber, and vitamin E. If you’d like to find more about the health benefits of black rice, you should read this article.
Though, as you can see in my recipe, actual black rice isn’t used much in this recipe. So I would think the health benefits will diminish significantly.
If you would like to make it healthier, you could increase the black rice. And, yes, this will change the color of the rice, taste and the texture. Also, the cooking time may vary too.
Ingredients for Korean Purple Rice (Serves 4 to 5)
- 2 cups short grain white rice
- 1 Tbsp black glutinous rice
- 2 cups & 1 Tbsp water (1:1 ratio for IH rice cooker or instant pot)
** A cup used here is a rice measuring cup (1 cup = approx 180 ml), not a standard measuring cup.
*** Rice and water 1 : 1 ratio applies if cooking in a IH rice cooker (e.g. Cuckoo or Cuchen) or Instant Pot. If cooking over the stove (absorption method), add 1.21 times more water compared to the rice weight (approx 1 : 1.125 volume ratio).
How to Make Korean Purple Rice
Perfect rice, whether it’s white, brown, black or other rice, can be different person to person as each individual has a different preference towards texture and consistency.
The cooking method below is based on my rice preference, which is fluffy while slightly firm.
If you like a different texture and consistency to mine, I suggest you experiment with the cooking method, water amount or cooking time while referring to my method. After 1-2 attempts you might find your favorite way!
-
Using IH Korean Rice Cooker (Cuckoo)
Using my Cuckoo rice cooker is by far my favorite way of making purple rice. It’s so easy and simple (Pretty much hands off!). And the good result is consistent.
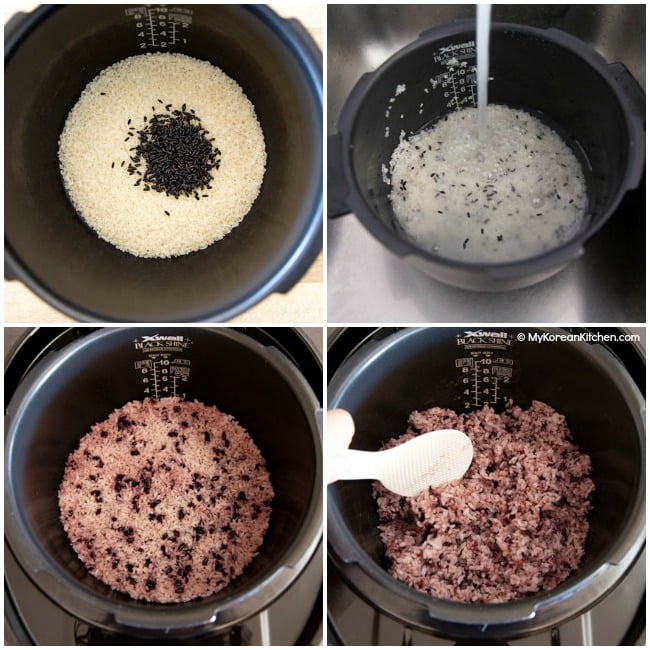

- Put the rice into the rice cooker inner pot and rinse the rice until the water is clear. (You will need to do 3 to 4 rounds of rinsing.) Drain the water well.
- Cover the rice with the water (1:1 ratio) and close the lid. Set the rice cooker to “백미 (baekmi)” setting. If your Cuckoo has an English mode, it may say “glutinous rice”.
- Wait until the rice cooks and switch to the keep warm setting. It takes 23-26 mins to complete. Fluff the rice with the rice paddle. Serve or store it for later. (Refer below for storage guide)
Cooking my rice in an instant pot is my second favorite options. I do like the result I get, but I do not like when my rice gets stuck to the bottom of the pot. Yes, it does come off fairly easily but still it is an inconvenience.
Also, you need to manually release the steam after natural release. Which is another inconvenience when comparing the work involved with my Cuckoo rice cooker.
Things to watch out for when you cook rice in an instant pot
I only have a stainless steel inner pot. And, I learnt from my experience that if you cook the rice for too long (even if it’s only 1 or 2 mins extra) or if you leave the rice in the pot for too long after the cooking cycle is finished, you precious rice will end up sticking to the bottom of the pot. So watch out for that.
Also, my quick google research shows that you can actually buy a non-stick coated inner pot for instant pot. This may resolve some of the issues I experienced.
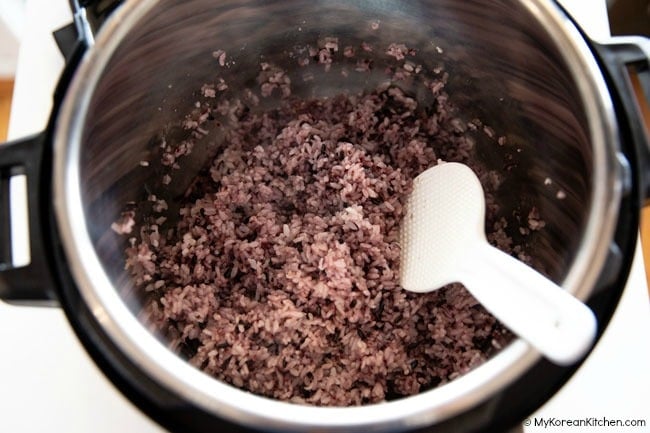

- Put the rice into the inner pot of the instant pot and rinse the rice until the water is clear. (You will need to do 3 to 4 rounds of rinsing.) Drain the water well.
- Cover the rice with the water (rice to water ratio is 1 :1) and set the instant pot to “pressure cook” at high pressure. Turn off the “keep warm” function. Make sure the steam release handle points at “sealing”. Set the timer to 3 mins and wait until the rice cooks.
- Natural release the steam for 10 minutes then quick release the residual pressure. (There shouldn’t be much pressure left by then.) FYI, the whole cooking cycle takes about 24 mins to complete.
- Open the lid and fluff the rice quickly with the rice paddle. Serve or store it for later. (Refer below for storage guide) If you leave the rice in the pot for too long, it will start stick to the bottom of the pot.
Cooking the rice over the stovetop is my least favorite option, because it’s more hands on. Nonetheless, you can successfully cook the purple rice in here too.
For the best result, use a heavy bottomed pot with tightly fitted lid, like a dutch oven Korean Purple Rice.
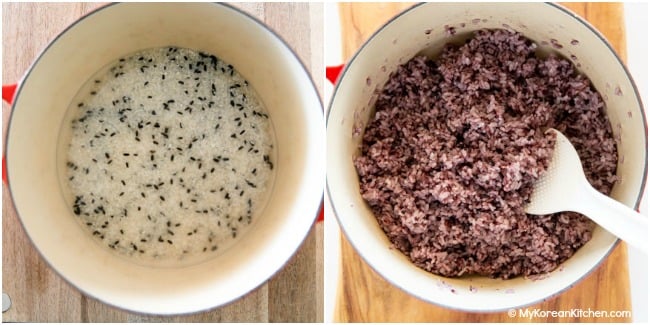

- Put the rice into the mixing bowl and rinse the rice until the water is clear. (You will need to do 3 to 4 rounds of rinsing.) Drain the water well.
- Transfer the rice into a pot and add the water. (Add 1.21 times more water compared to the rice weight (approx 1 : 1.125 volume ratio) as more steam evaporates in the pot.)
- Bring the pot to boil over medium high heat until the water is boiling. (It will takes 8-9 mins). Reduce the heat to medium then boil for a further 6-7 mins. Then gradually reduce the heat to low and simmer for another 5 mins. While you may be very tempted, do not open the lid during boiling at any stage as it will throw off the water evaporation rate.
- Remove the pot from the stove and rest it for 15 mins (with lid still on). The rice is still cooking!
- Open the lid and fluff the rice with the rice paddle. Serve or store it for later. (Refer below for storage guide)
How to Store Cooked Korean Purple Rice
If you cooked too much rice for your needs, the best way to store it is in the freezer.
Portion / Divide the rice into smaller serving portions (to suit your future needs) then put it in airtight, freezer and microwave safe containers. Do this as soon as the rice is cooked while minimising the steam escaping.
This is so that when you reheat this rice, the steam will help with keeping the rice moist while microwaving. And, this rice is as good as freshly cooked rice!
You can keep the rice stored in the freezer for up to one month. (While some research shows that you can keep it indefinitely as long as it is kept below -18 C / 0 F.)
If you want to use the rice for stir frying, I would recommend storing it in the fridge (for up to 3 to 4 days) as it naturally dries out a bit in there. This will make stir frying easier.
What to Serve with
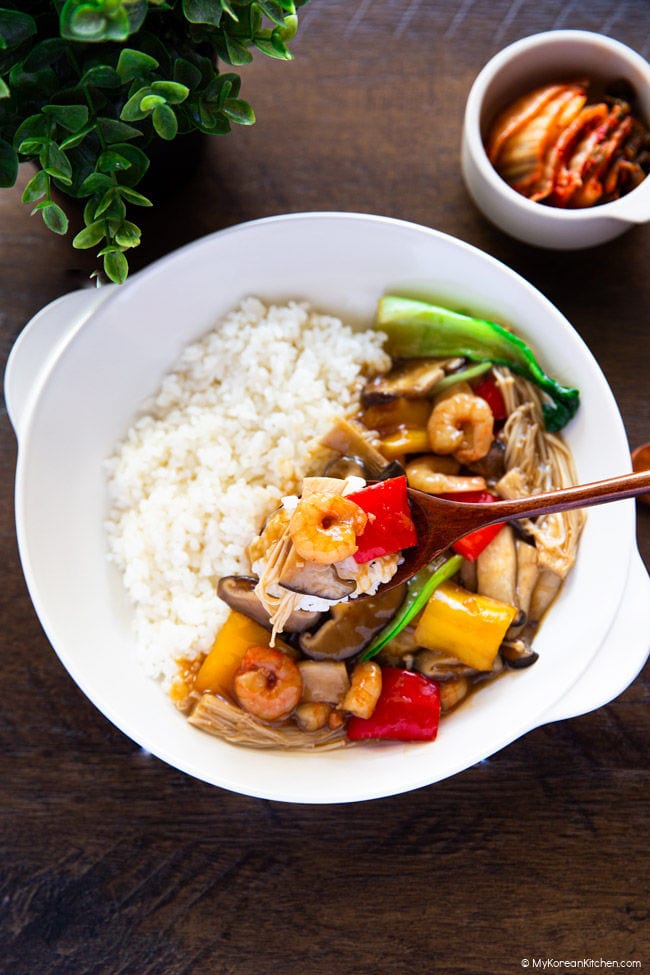
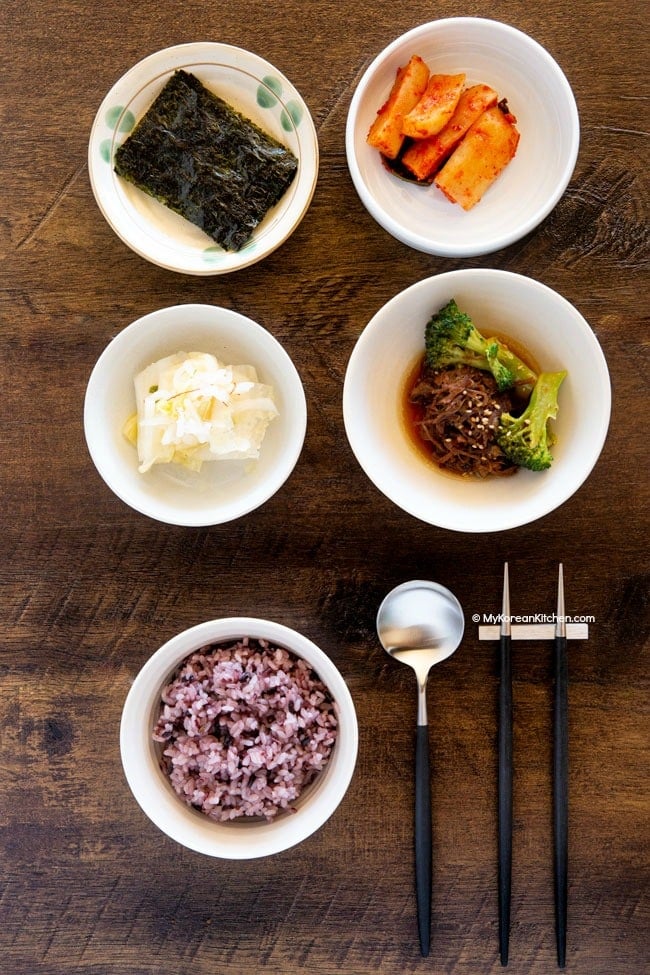
Obviously, the best dishes to serve with Korean purple rice are Korean side dishes. See the picture below as an example. If you’d like some Korean side dish inspirations, check from here [Korean banchan recipes].

Love Korean food? Browse lots more Korean recipes from my easy Korean recipe collections. And subscribe to my newsletter for all of the latest updates including new recipes, what MKK communities are cooking and K-Dramas!

USING IH KOREAN RICE COOKER (CUCKOO)
- Put the rice into the rice cooker inner pot and rinse the rice until the water is clear. (You will need to do 3 to 4 rounds of rinsing.) Drain the water well.
- Cover the rice with the water (1:1 ratio) and close the lid. Set the rice cooker to “baekmi” setting. If your Cuckoo has an English mode, it may say “glutinous rice”.
- Wait until the rice cooks and switch to the keep warm setting. It takes 23-26 mins to complete. Fluff the rice with the rice paddle. Serve or store it for later. (Refer below for storage guide)
USING INSTANT POT
- Put the rice into the inner pot of the instant pot and rinse the rice until the water is clear. (You will need to do 3 to 4 rounds of rinsing.) Drain the water well.
- Cover the rice with the water (rice to water ratio is 1 :1) and set the instant pot to “pressure cook” at high pressure. Turn off the “keep warm” function. Set the timer to 3 mins and wait until the rice cooks.
- Natural release the steam for 10 minutes then quick release the residual pressure. (There shouldn’t be much pressure left by then.) FYI, the whole cooking cycle takes about 24 mins to complete.
- Open the lid and fluff the rice quickly with the rice paddle. Serve or store it for later. (Refer below for storage guide) If you leave the rice in the pot for too long, it will start stick to the bottom of the pot.
USING STOVETOP
- Put the rice into the mixing bowl and rinse the rice until the water is clear. (You will need to do 3 to 4 rounds of rinsing.) Drain the water well.
- Transfer the rice into a pot and add the water. (Add 1.21 times more water compared to the rice weight (approx 1 : 1.125 volume ratio) as more steam evaporates in the pot.)
- Bring the pot to boil over medium high heat until the water is boiling. (It will takes 8-9 mins). Reduce the heat to medium then boil for a further 6-7 mins. Then gradually reduce the heat to low and simmer for another 5 mins. While you may be very tempted, do not open the lid during boiling at any stage as it will throw off the water evaporation rate.
- Remove the pot from the stove and rest it for 15 mins (with lid still on). The rice is still cooking!
- Open the lid and fluff the rice with the rice paddle. Serve or store it for later. (Refer below for storage guide)
*** Rice and water 1 : 1 ratio applies if cooking in a IH rice cooker (e.g. Cuckoo or Cuchen) or Instant Pot. If cooking over the stove (absorption method), add 1.21 times more water compared to the rice weight (approx 1 : 1.125 volume ratio).
****There are lots of helpful tips written within the post. So be sure to read them first before cooking!
Calories: 281kcal | Carbohydrates: 61g | Protein: 6g | Fat: 1g | Saturated Fat: 1g | Sodium: 8mg | Potassium: 85mg | Fiber: 1g | Sugar: 1g | Calcium: 23mg | Iron: 0.6mg
The nutrition information shown is an estimate provided by an online nutrition calculator. It should not be considered a substitute for a professional nutritionist’s advice.
